

Before any long drive, run a 10 to 20 minute pre-trip inspection focusing on tires, battery, fluids, brakes, lights, and an emergency kit. Check for open safety recalls with your vehicle’s VIN, and if maintenance has lapsed or the vehicle’s history is unclear, book a shop multipoint inspection instead of relying on a visual check alone.
Table of Contents
- Quick pre-trip checklist you can finish in 10 to 20 minutes
- Tires: how to check pressure, tread, and spare correctly
- Battery and electrical checks: quick tests and when to load-test
- Fluids and filters to check or top off before you leave
- Brakes, suspension, and steering: owner checks and mechanic triggers
- Belts, hoses, and cooling system checks
- Lights, wipers, and visibility systems
- HVAC and cabin comfort checks
- Emergency kit, spare tire, and basic tools to pack
- How to check recalls with your VIN (NHTSA VIN lookup)
- When to book a professional multipoint inspection or service visit
- Final pre-departure routine: a 15-minute walkthrough
- What a professional multipoint inspection includes
- Verify engine performance indicators: check engine light and unusual noises
- Ensure registration, insurance, and necessary documents are up to date and accessible
- Plan and verify GPS and navigation system functionality
- Check exhaust system for leaks and damage
- Integrity Auto Inc: pre-trip inspections and booking info
- Sources
- FAQ
Quick pre-trip checklist you can finish in 10 to 20 minutes
A short walk-around and a few basic tests catch most problems before they become roadside emergencies. Work through these items in order, and treat any failed item as a signal to either fix it now or see a mechanic before departure.
- Tires: check pressure cold against the door placard, inspect tread depth, and look at the spare.
- Battery: look for corrosion on terminals and a secure mounting bracket.
- Fluids: check oil, coolant, brake fluid, and washer fluid levels.
- Lights: test headlights, brake lights, turn signals, and hazards.
- Brakes: listen for grinding or squealing and note any pulling.
- Belts and hoses: check for cracks, bulges, or soft spots.
- Recall check: run your VIN through the NHTSA VIN lookup tool.
Set aside 10 minutes for a car with a known service history and no warning lights, and closer to 20 minutes if you are also checking tread depth, testing all lights individually, and packing an emergency kit. Keep a tire pressure gauge, a flashlight, and a basic tool kit in the glove box year-round so this checklist never depends on finding equipment first.
Any go or no-go flag is simple: a soft tire, a corroded terminal, or a brake noise means stop and address it before the trip, not after you are two hours down the highway.
Tires: how to check pressure, tread, and spare correctly
Tire pressure should always be checked cold, meaning the vehicle has not been driven for at least three hours, since heat from driving raises pressure and can hide a genuine underinflation problem, according to NHTSA’s tire safety guidance. The correct PSI number comes from the door placard or owner’s manual, never from the number printed on the tire’s sidewall, which reflects the tire’s maximum rating rather than the vehicle’s recommended pressure.
Tread depth determines how much grip remains, and the same NHTSA guidance points to the classic penny test: insert a penny into the tread groove with Lincoln’s head facing down, and if you can see the top of his head, the tread has worn down to 2/32 of an inch or less and the tire needs replacing. Tires at or below that depth lose meaningful traction in wet conditions, which matters more on unfamiliar roads during a long trip.
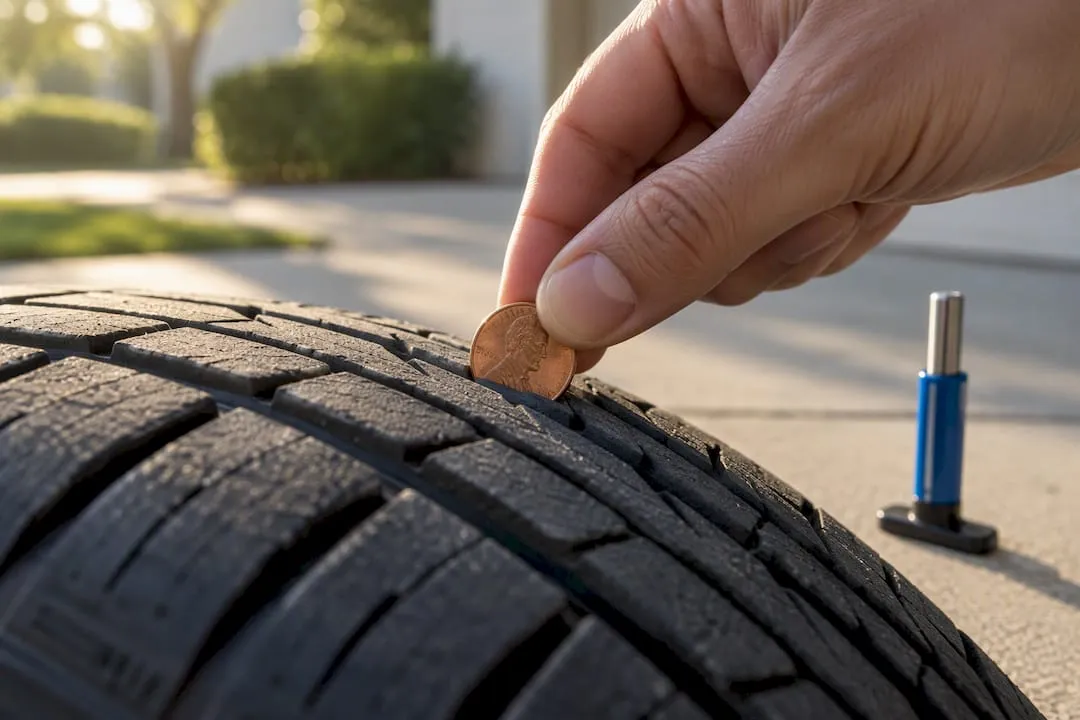
Beyond depth, look across the tread for uneven wear patterns, cuts, or bulges in the sidewall. Wear that is heavier on one edge than the other often points to an alignment or suspension issue rather than a problem with the tire itself, and that kind of wear tends to recur even after the tire is replaced unless the underlying cause is corrected. Check the spare’s pressure and condition too, along with the jack and lug wrench, since a spare that has sat unused for years can be just as unreliable as the tire it is meant to replace.
Pro Tip: Check tire pressure the night before you leave, not the morning of, so a low tire does not turn into a last-minute scramble to find an air pump.
Battery and electrical checks: quick tests and when to load-test
A dead battery is one of the most common reasons a road trip stalls before it starts, so a few minutes of inspection is worth the time. Open the hood and look at the terminals for white or greenish corrosion buildup, confirm the battery is mounted securely with no visible cracks in the case, and check that cables are snug; for guidance on safe cleaning, see our tips on a clean engine bay: safe steps and ceramic protection.
- Corrosion on terminals often signals a slow charging problem building underneath.
- Dimming headlights or slow engine cranking can point to a weakening battery or alternator.
- A battery older than three to five years is a candidate for professional testing before a long trip, regardless of how it looks.
- Jumper cables or a portable jump starter belong in the trunk even when the battery seems fine.
Visual checks only tell part of the story. AAA-affiliated guidance identifies battery failure as one of the leading causes of roadside breakdowns, and it recommends a professional load test before extended travel, particularly since extreme heat shortens battery life and battery failures tend to happen suddenly rather than gradually. A load test measures actual capacity under stress, which a visual inspection cannot do.
Fluids and filters to check or top off before you leave
Fluids lubricate, cool, and protect nearly every moving part in the vehicle, and low or degraded fluid is one of the easiest problems to catch before it becomes a breakdown.
- Engine oil: pull the dipstick, wipe it clean, reinsert it, and check the level; if the oil looks dark and gritty or a change is due soon, get it done before the trip rather than during it.
- Coolant: check the level in the overflow reservoir when the engine is cold, and look under the vehicle for any signs of leaking near the radiator or hoses.
- Brake fluid: confirm the level sits between the minimum and maximum marks; cloudy or dark fluid is worth having a mechanic check, since brake systems on newer vehicles sometimes use electric components that behave differently from older hydraulic-only setups.
- Transmission and power steering fluid: check levels if your vehicle has a manual dipstick for either system; consult your owner’s manual since many newer transmissions are sealed.
- Washer fluid and air filters: top off washer fluid, and replace the engine air filter or cabin air filter if either looks visibly dirty or clogged.
Catching a fluid problem in the driveway costs a few minutes. Catching the same problem on the shoulder of a highway costs a tow.
Brakes, suspension, and steering: owner checks and mechanic triggers
Press the brake pedal before you start the engine and note whether it feels firm or sinks toward the floor. A soft or spongy pedal, grinding or squealing noises when braking, or the vehicle pulling to one side under braking are all signs that warrant a mechanic’s attention rather than a wait-and-see approach.
Some pads have wear indicators that make a light metallic squeal when they are getting thin, which is intentional and meant to catch your attention early. Brake fluid that looks dark or has not been changed in years should also be flagged for a technician, since fluid absorbs moisture over time and that moisture reduces braking performance under heat.
Suspension problems tend to show up as a rougher ride than usual, a vehicle that sags noticeably on one corner, or visible fluid leaking from a shock absorber. Excess play in the steering wheel, where you can turn it slightly before the wheels respond, is worth having checked too, since it can point to worn steering components that affect handling at highway speed.
Belts, hoses, and cooling system checks
Squeeze coolant hoses gently and feel for firmness. A hose that feels unusually soft, brittle, or shows bulging or cracking near the clamps is at risk of failing under the heat and pressure of a long drive, and any visible leak or damp residue near a hose connection deserves attention before departure.
Modern serpentine belts made from EPDM material can look nearly new even after they have worn out internally, since this material does not crack the way older rubber belts did. Many technicians recommend replacing the serpentine belt on a mileage schedule, often around 60,000 miles, rather than trusting a visual check alone, since a belt that snaps mid-trip can take out the alternator or power steering along with it.
Check the coolant level, and if the engine has run hot recently or the temperature gauge climbs faster than usual, have the thermostat and cooling fan checked before you rely on the system for hours of highway driving in warm weather.
Lights, wipers, and visibility systems
Walk around the vehicle with the engine running and test every light: headlights on both low and high beam, brake lights, turn signals, hazards, and reverse lights. A second person can help confirm brake and signal lights from outside the vehicle, or you can back up toward a reflective surface like a garage door to check them alone.
Inspect wiper blades for cracking, tearing, or streaking, and replace them if they leave smears across the windshield, since a highway rainstorm is the worst time to discover a worn blade. Top off washer fluid, and check the windshield itself for chips or cracks. A small chip caught early can often be repaired quickly, while waiting can let it spread across the glass under the stress of temperature changes and long highway miles.
HVAC and cabin comfort checks
Turn on the air conditioning and heater separately and confirm each reaches a noticeable temperature within a few minutes, and check that airflow reaches the rear vents if passengers will be sitting there. Test the front and rear defrosters too, since fogged glass on a long drive is both a comfort issue and a visibility hazard.
If airflow feels weak or the cabin smells musty when the fan runs, the cabin air filter is likely due for replacement. This is a low-cost check that takes only a few minutes on most vehicles.
Air conditioning failure is more than an inconvenience on a summer road trip. For children, older passengers, or anyone with a health condition sensitive to heat, a working cooling system is part of the vehicle’s basic safety equipment, not an optional comfort feature.
Emergency kit, spare tire, and basic tools to pack
Ready recommends assembling a roadside kit well before departure day so it is not an afterthought packed in a hurry.
- A charged phone and a car charger to call for help if needed.
- A first aid kit, flashlight, and emergency blankets for basic response and visibility.
- Jumper cables, a tire pressure gauge, a jack, and basic hand tools for roadside repairs.
- Nonperishable food and water in case of an extended delay.
Check the spare tire’s pressure and confirm the jack and lug wrench are both present and functional, since discovering a missing jack after a flat defeats the purpose of carrying a spare at all. Store the kit somewhere accessible, not buried under luggage where retrieving it during an emergency becomes its own problem.
How to check recalls with your VIN (NHTSA VIN lookup)
Your vehicle identification number is stamped on the dashboard near the windshield on the driver’s side, and it also appears on your registration and insurance card. Enter that 17-character VIN into the NHTSA VIN lookup tool to see any outstanding safety recalls tied to your specific vehicle, not just its make and model in general.
Manufacturers are required to provide a free remedy for open safety recalls, so there is no cost to having a recall addressed. Running this check before a long trip matters because a recall can involve anything from an airbag defect to a fuel system issue, and resolving it before you put extra miles on the vehicle removes a risk you would otherwise be carrying with you.
When to book a professional multipoint inspection or service visit
Some situations call for a mechanic’s eyes rather than a driveway checklist. If your last service is more than a few months overdue, if you bought the vehicle without a clear service history, or if you have noticed a warning light, an unusual noise, or a fluid leak, schedule a visit before you rely on the car for a long drive.
Timing belts, worn brake pads nearing metal contact, and a battery testing weak on a load test are all examples of issues that are manageable now but costly if they fail on the road. When you book an inspection, ask the shop to walk you through what a complimentary multipoint inspection covers and how findings are documented, so you know exactly what was checked and what, if anything, needs attention before you leave. If you are unsure whether your vehicle’s maintenance is current, this guide on scheduling a mechanic’s inspection explains the signs that a checkup is overdue.
Final pre-departure routine: a 15-minute walkthrough
Run this sequence the morning you leave, after any repairs from earlier checks are already done.
- Walk around the vehicle and glance at all four tires for obvious flats or damage.
- Test headlights, brake lights, and turn signals one more time.
- Check oil and coolant levels if the vehicle has sat overnight and is cold.
- Confirm cargo is secured and does not block your rear view.
- Fill the fuel tank and confirm your route or first stop.
- Tell someone your itinerary and expected arrival time.
If anything fails this final check, treat it as a stop sign. A vehicle that shows a warning light or a fluid leak the morning of departure should go to a mechanic first, even if that means adjusting your start time.
What a professional multipoint inspection includes
A shop multipoint inspection typically covers 12 to 23 points on a basic check or more than 100 points on a comprehensive one, including brake wear, battery load testing, belt and hose condition, all fluid levels, every exterior light, and suspension components. Technicians use a vehicle lift and diagnostic tools to see areas a driveway check cannot reach, which matters most for anyone whose maintenance history is uncertain or overdue. This level of inspection is worth scheduling before a long trip rather than after a warning sign appears on the highway.
Verify engine performance indicators: check engine light and unusual noises
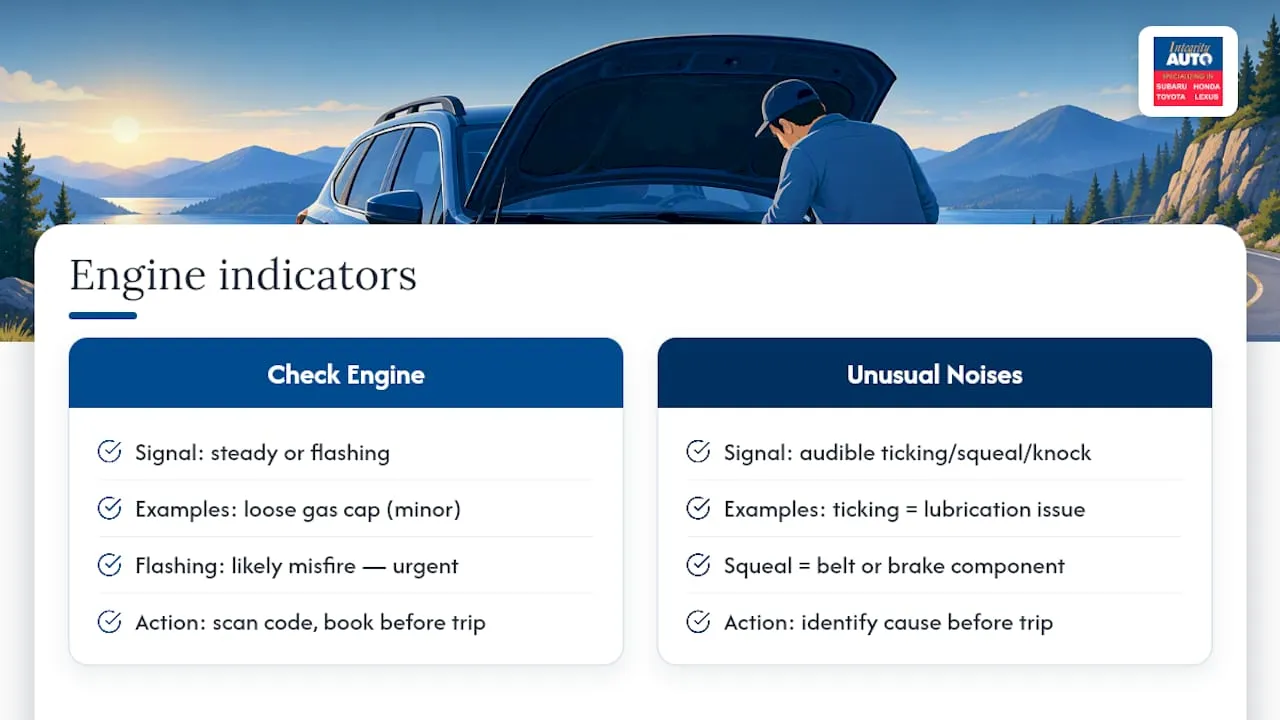
A check engine light that stays on, even without other symptoms, means the vehicle’s onboard computer has detected something worth investigating, and it should be read with a diagnostic scanner before a long trip rather than ignored. Some causes are minor, like a loose gas cap, while others point to issues that worsen under the sustained speeds and heat of highway driving.
Unusual noises deserve the same attention. A ticking sound from the engine can indicate a lubrication issue, a squeal from the front of the vehicle often points to a belt or brake component, and a knock or clunk from underneath can signal a loose exhaust part or worn suspension joint. None of these noises are guaranteed to cause a breakdown, but each one is worth identifying before you are hours from home rather than guessing at the cause from a highway rest stop.
If the check engine light is flashing rather than staying solid, that typically signals a more urgent issue, such as an engine misfire, and driving on should be limited until a mechanic checks it. A steady light gives you more room to schedule a diagnostic appointment before departure, but it should not be left unchecked through an entire trip.
Ensure registration, insurance, and necessary documents are up to date and accessible
Before any long drive, confirm your vehicle registration and insurance card are both current and physically in the car, whether in the glove box or saved on your phone. An expired registration or lapsed insurance policy is a problem you do not want to discover during a traffic stop or, worse, after an accident far from home.
If your trip crosses state lines, check that your insurance provides the coverage you expect outside your home state, since policies can vary in what they cover once you leave familiar territory. Keep a printed or digital copy of your roadside assistance information as well, along with any relevant vehicle service records in case a mechanic in an unfamiliar location needs to see recent work performed on the car.
A few minutes confirming these documents before departure saves a much longer delay if you are asked for them unexpectedly.
Plan and verify GPS and navigation system functionality
Test your GPS or navigation app before you leave, not after you are already on the highway and realize the maps have not updated in months. Confirm the device or app has current maps downloaded, especially for any stretch of the route that passes through areas with weak cell coverage, since a navigation app that depends entirely on a live signal can fail exactly where you need it most.
Check that your phone mount or built-in dashboard display is charging properly and securely positioned so it does not block your view of the road. If you are relying on a phone for navigation, download an offline map of your route as a backup, and consider printing or saving a basic set of directions in case the app fails entirely partway through the trip.
Check exhaust system for leaks and damage
Listen for the exhaust system before you look at it. A noticeably louder engine, a rattling sound from underneath the vehicle, or a smell of exhaust fumes inside the cabin are all signs of a possible leak or damaged component, and any of these should be checked before a long drive.
Exhaust leaks are a safety concern beyond noise, since a damaged exhaust system can allow carbon monoxide to enter the cabin, particularly during highway driving with windows closed and the ventilation system pulling in outside air. If you notice rust, a hanging pipe, or a section that looks loose underneath the vehicle, have a mechanic inspect the full system rather than driving on it for hundreds of miles.
Integrity Auto Inc: pre-trip inspections and booking info
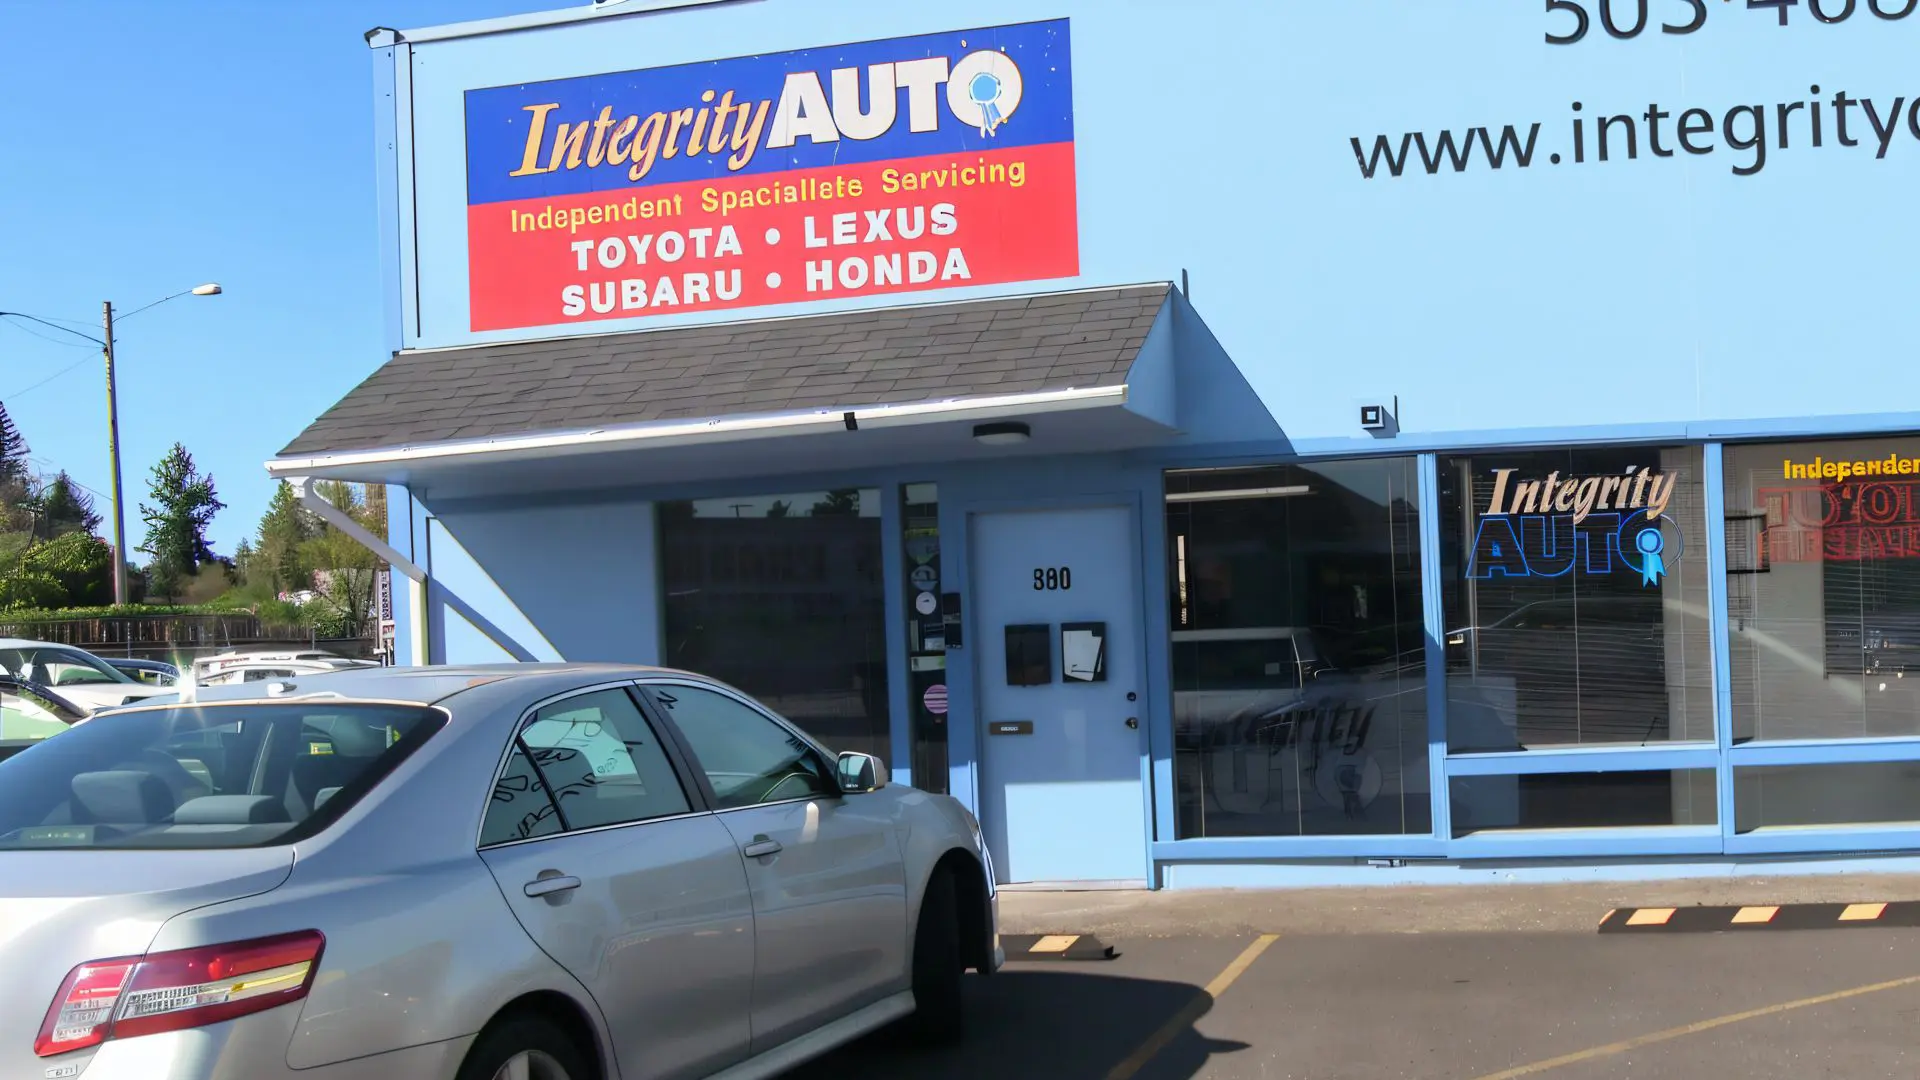
A thorough pre-trip check takes time that not every owner has to spare, and some issues, like a weak battery or worn brake pads, are easier to catch on a lift than in a driveway. Integrity Auto Inc offers a complimentary multipoint vehicle inspection for Toyota, Lexus, Subaru, and Honda owners in the Portland, Oregon area, covering the same systems this guide walks through, with the added benefit of diagnostic tools and ASE certified technicians.
- Battery load testing and replacement if needed.
- Brake inspection covering pads, rotors, and fluid condition.
- Coolant, belt, and hose checks ahead of long-distance driving.
If your last service is recent and nothing on this checklist raised a flag, you are likely fine to drive on your own inspection. If something did, or if your maintenance history is uncertain, book a Toyota service and repair appointment or schedule Honda service before you leave.
Sources
- National Highway Traffic Safety Administration — Tires
- NHTSA VIN recall lookup
- Ready
- AAA guidance reported by WKYC on heat impacts and battery failures
FAQ
What does a pre-trip inspection consist of?
A pre-trip inspection covers tires, battery, fluid levels, brakes, lights, belts and hoses, and an emergency kit check, along with a recall check using your VIN through the NHTSA VIN lookup tool. Most of these checks take 10 to 20 minutes when done in sequence.
What to inspect before a road trip?
Focus on tire pressure and tread, battery condition, oil and coolant levels, brake response, and all exterior lights, following NHTSA’s tire safety recommendations for checking tires cold and using the penny test for tread depth. Pack an emergency kit based on Ready.gov’s recommendations and confirm your registration and insurance are current.
What are the 7 steps of a pre-trip inspection?
Definitions vary by source, but a common practical sequence covers tires, battery, fluids, brakes, lights and wipers, belts and hoses, and an emergency kit check, followed by a recall lookup. Professional shops often expand this into a longer multipoint inspection covering suspension, exhaust, and additional diagnostic checks.
How hard is a pre-trip inspection?
A basic pre-trip inspection is manageable for most owners in 10 to 20 minutes using a tire gauge, a flashlight, and the owner’s manual for reference. Issues that require lift access, a load test, or diagnostic tools, such as battery capacity or suspension wear, call for a professional multipoint inspection instead of a driveway check.


